Difference between revisions of "Msc1G3:Grasshopper"
From m4h
(→Screenshots Week 9) |
(→Screenshots Week 9) |
||
| (20 intermediate revisions by one user not shown) | |||
| Line 24: | Line 24: | ||
<gallery mode="packed-hover"> | <gallery mode="packed-hover"> | ||
Image: 14-12-19-step 1.jpg | | Image: 14-12-19-step 1.jpg | | ||
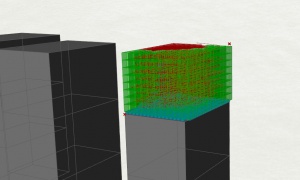
| − | Image: 14-12-19-step 2.jpg | | + | Image: 14-12-19-step 2.jpg |Calculating the cut-outs for the existing floor slabs according to wind loads |
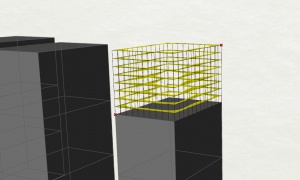
| − | Image: 14-12-19-step 3.jpg | | + | Image: 14-12-19-step 3.jpg |Boundary surface for the new facade |
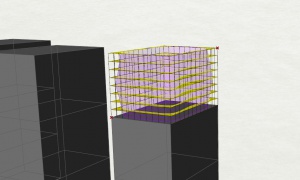
| − | Image: 14-12-19-step 4.jpg | | + | Image: 14-12-19-step 4.jpg |Shadowing |
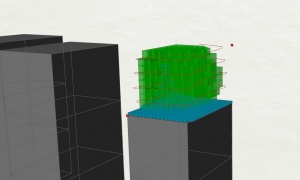
| − | + | Image: 14-12-19-step 6.jpg |Assumed pathway through the landscape, projected to boundary surface | |
| − | Image: 14-12-19-step 6.jpg | | + | Image: 14-12-19-step 7.jpg |Distribute the low "density" areas according to the shadow-diagram |
| − | Image: 14-12-19-step 7.jpg | | + | Image: 14-12-19-step 8.jpg |Distribute the high "density" areas according to the shadow-diagram |
| − | Image: 14-12-19-step 8.jpg | | + | Image: Step 9.PNG |Map the low and dense areas to an array of 200 points |
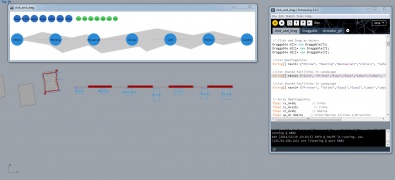
| − | Image: | + | Image: 14-12-19-step 12.jpg |Transfer Data to Processing - Watch Video |
| − | Image: 14-12-19-step | + | Image: 14-12-19-step 13.jpg |Transfer Processingdata into Grasshopper |
| − | + | Image: 14-12-19-step 14.jpg |Optimize the spatial distribution with galapagos | |
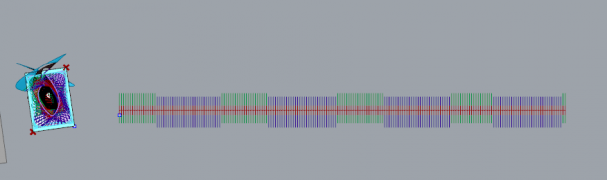
| − | + | Image: 14-12-19-step 15.jpg |Map the program to the pathway | |
| − | Image: 14-12-19-step 13.jpg | | + | Image: 14-12-19-step 16.jpg |Depth of the landscape dependent on the program |
| − | Image: 14-12-19-step 14.jpg | | + | Image: 14-12-19-step 17.jpg |Create wiring |
| − | Image: 14-12-19-step 15.jpg | | + | |
| − | Image: 14-12-19-step 16.jpg | | + | |
| − | Image: 14-12-19-step 17.jpg | | + | |
| − | + | ||
| − | + | ||
</gallery> | </gallery> | ||
Latest revision as of 15:47, 19 December 2014

Screenshots Week 9
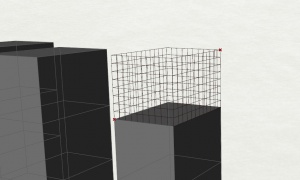
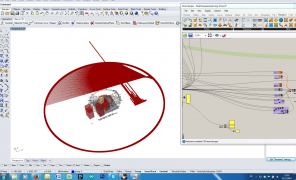
Calculating the cut-outs for the existing floor slabs according to wind loads
Boundary surface for the new facade

Shadowing

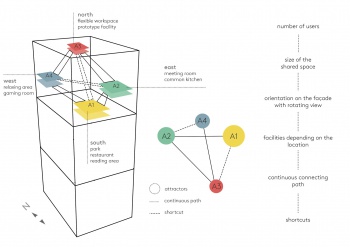
Assumed pathway through the landscape, projected to boundary surface
Distribute the low "density" areas according to the shadow-diagram
Distribute the high "density" areas according to the shadow-diagram
Map the low and dense areas to an array of 200 points

Transfer Data to Processing - Watch Video
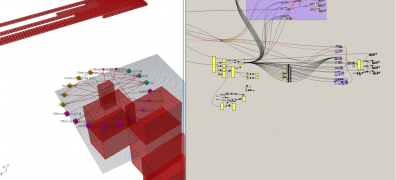
Transfer Processingdata into Grasshopper
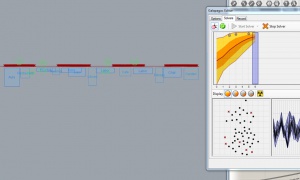
Optimize the spatial distribution with galapagos
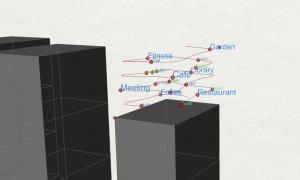
Map the program to the pathway
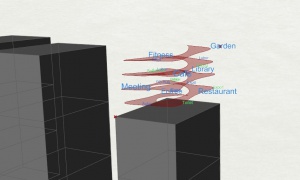
Depth of the landscape dependent on the program

Create wiring
Videos Week 9
Screenshots Week 6
Realtimespacialplanning
Realtimespacialplanning

- This page was last modified on 19 December 2014, at 15:47.
- This page has been accessed 3,662 times.
- Privacy policy
- About m4h
- Disclaimers


